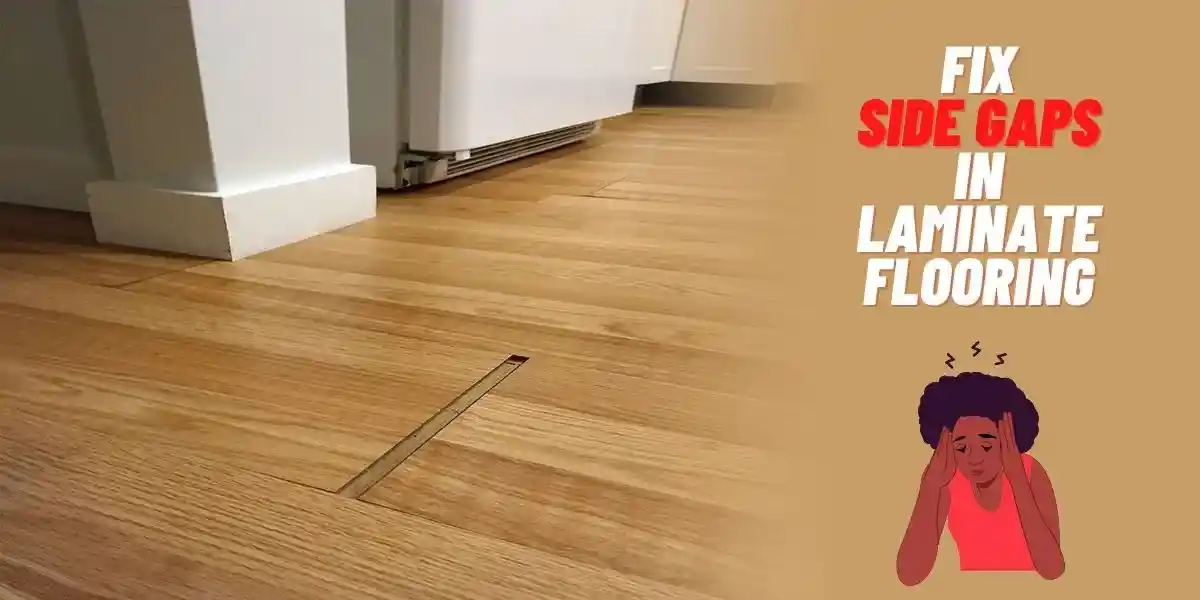
Laminate flooring is a popular option for homeowners. It is popular due to its affordability and attractive appearance. With a click-clamp, laminate flooring is assembled at its edge using tongue and groove.
Yet, its lateral and longitudinal edges will develop gaps between the laminate planks. This is due to expansion and contraction over time.
It results in unsightly gaps opening up, bubbling, and buckling. Especially if you have interlocking laminate flooring.
So, if you spot side gaps in your laminate flooring, you should fix them immediately. By doing this, you can increase its aesthetic appearance and durability.
Fortunately, fixing side gaps in laminate flooring is a straightforward process. That will not consume your precious time after reading this article.
Before we mention some of the quick hacks, let’s look at what causes side gaps in laminate flooring.
What Causes Side Gaps in Laminate Flooring?
Understanding the reason behind side gaps will help you make a more precise decision depending on the specific cause. So, you can handle the issue more effectively.
Poor Installation of the Planks
Incorrect installation practices, such as failing to stagger the joints properly. Or not using spacers during installation, can contribute to side gaps. Following the manufacturer’s installation guidelines is crucial to avoid such issues.
Improper Expansion Gaps
Laminate flooring needs space to expand and contract with changes in temperature and humidity. If there is insufficient expansion gap left along the walls or fixed structures. The planks may push against each other, leading to side gaps.
Uneven Subfloor
Even if you strictly adhere to the manufacturer’s installation instructions. Yet, an uneven subfloor can cause laminate planks to separate laterally and longitudinally.
It causes uneven layering of planks across the floor, resulting in open joints.
Open joints across the flooring lead to further damage. Because they cause chipping and delamination of the laminate flooring.
Fix any problems you find to create a level surface. This way, your laminate planks can fit together, and you won’t have to deal with gaps along the edges.
Environmental Factors
Drastic temperature changes can affect the dimensions of laminate flooring. Sudden shifts in temperature can cause the planks to contract or expand. Potentially resulting in side gaps.
Also, moisture weakens the adhesive used to adhere laminate flooring to the subfloor. And, with time, it becomes loose, leading to the separation of the planks across the floor.
Heavy Objects
Be careful with heavy objects on laminate floors, such as furniture, and refrigerators. When you drag these, it causes side gaps.
That’s because of the high impact pressure and the change in temperature and humidity. This compound loosens the edges of the laminate floor over time.
Avoid dragging or dropping heavy things, and use furniture pads to distribute weight. This way, you can keep your laminate floor intact without those unwanted gaps showing up.
5 Best Ways to Fix Side Gaps in Laminate Flooring
Use Rubber-soled Shoes
The easiest solution for fixing small gaps between the edges of the planks. Put on your rubber-soled boots and start hitting the plank several times until the gap closes.
It is better to hit the problematic plank inwards in the same row. While moving the neighboring planks away from the wall and towards the center. It is especially true if you are correcting more than one plank.
In this way, gaps are kept from widening across the floor. It’s a straightforward way to fix those annoying gaps without any special tools.
Use a Floor Gap Fixer
Rubber floor fixers are tools that use the principle of rubber shoes. They consist of a rubber mallet and a sticky metal block.
The adhesive rubber mallet taps the planks and closes the gap using the rubber mallet. By pressing the block down on the plank’s surfaces.
Besides, if you wish to use this tool effectively, you should follow these steps;
- Peel back the plastic covering to expose the rubber pad underneath. You will use it to grip the problematic planks while trying to push them back into place.
- Place the block 2.5 cm from the end of the problematic planks. Then, anchor the block with both hands while pressing firmly on the top side. This helps to secure the board and prevent slipping during repairs
- Once the block is in place, please do not remove it because it weakens the adhesive pad’s hold.
- For the above reasons, start filling in the gaps as you move from the walls and towards the center of the floor.
- Tapping the end of the block with a mallet and holding it steady with one hand close the gap. Then, move the problematic plank closer to the one it moved away from by giving a few hits from the furthest side.
- After closing the gaps, remove the floor gap fixer by pulling it up from the floor.
Use Wood Glue
Wood glue will also seal the gaps in laminate flooring because it is super adhesive.
Yet, for the most effective result, you should choose a high-quality wood glue. Because it can hold the planks in place regardless of stress.
Follow the guide below if you want the best outcome from using this method;
- Start by cleaning the gaps between the planks to remove dust and debris. Because wood glue sticks better to clean surfaces.
- Then scoop up the glue with any of the above tools and apply the glue to the exposed gap.
- Spread thick glue and align the grooves within the problematic plank as you move in series. Moreover, please don’t take too much time applying the wood glue because it dries soon.
- Using the palm of your hand, strike at an angle to close the gap between the displaced planks. You may consider using a floor gap fixer tool for better precision instead of your palm. Repeat this procedure with any remaining gaps.
- Once finished, wipe away the excess glue with a damp rag to clean up and remove residual glue. It prevents discoloring of the laminate floor.
Aside from wood glue, you can also use caulk or wood putty to fill the side gaps in laminate flooring.
But, you will need more equipment and 180-grit sandpaper to sand down the excess material. Because it takes much time to dry and has the smoothest finish.
Use a Laminate Pull Bar
A laminate pull bar looks like a pry bar but with one curved edge and the other edge with a broad curve. The tool is ideal for closing lateral gaps induced by extreme climatic conditions.
The solution is seamless as it allows you to tap the end of each row to close all the gaps in a single go. It’s easier than tapping individual planks together, which is also time-consuming.
To fix lateral gaps with laminate pull bar, simply;
- Remove the baseboard from one end of the room.
- Hook the pull bar over the edge of the plank.
- Tap the edge with a hammer.
- Then, move the entire row toward the opposite wall.
- Close all the gaps at once.
Replacing and Reinstalling the Laminate Flooring Planks
These methods effectively fix temperature changes and high impact from heavy objects. But, they won’t fix uneven subflooring, poor installation, and high humidity gaps.
To fix this issue, it is recommended to uninstall the laminate flooring. Then, level the subfloor, install dehumidifiers, replace any damaged planks, and reinstall it.
This method is time-consuming, cumbersome, and expensive. By doing this, you can avoid long-term gaps in the subfloor. Because you can correct the initial professional gaps.
Also See: How to Replace Laminate Floor in Your House?
Tips to Prevent Gapping in Laminate Flooring
- Acclimating the Laminate Planks: First, you should acclimate the laminate planks for about 48-72 hours. This allows the planks to acclimate to internal environmental factors and complications
- Ensure the Subfloor is Leveled: Before installing, we recommend you use a spirit level to confirm if the subfloor is leveled. Cleaning up the surface and looking for rises and depressions every 2-3 feet. It will provide a more accurate result.
- Call in for a Professional Installation Service: If you are new to DIY. Please contact a professional installer. It’s because installing laminate flooring with insufficient knowledge leaves room for error. They will have the necessary tools, manpower, and expertise. So, they get the job done quickly and deliver with guaranteed satisfaction.
- Prevent Excess Moisture: The acclimatization of laminate planks won’t be enough during winter due to humidity changes. If excessive moisture or humidity exists, install a dehumidifier or air conditioner.
- Use Proper Underlayment: Ensure you use a high-quality underlayment that provides a moisture barrier. This helps prevent moisture from reaching the laminate planks. And reducing the risk of expansion and contraction.
Read More on Laminate Floors
- Can You Nail Down Laminate Flooring? (Answered)
- Laying Laminate Flooring: 13 Common Mistakes to Avoid!
- 7 Best Ways to Fix Peeling Laminate Floor (Must-Try!)
- Will Acetone Damage the Laminate Floor? (Explained)
- 9 Best Ways to Keep Rugs From Slipping on Laminate Floors (Must-Try!)