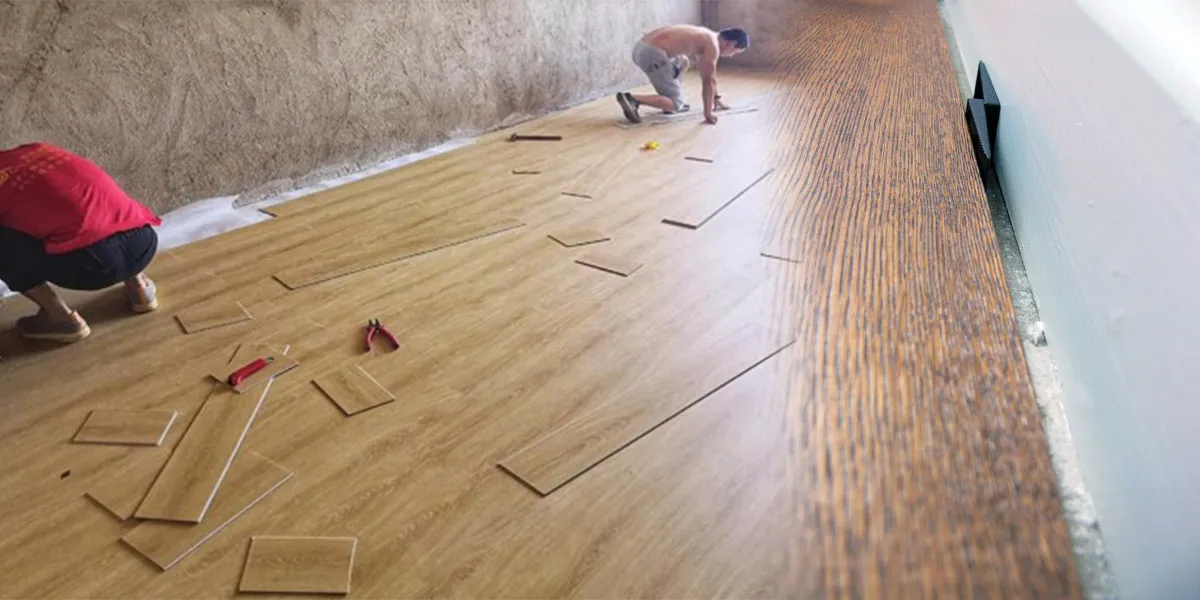
So, you’ve decided to give your home a vinyl flooring makeover – easy to clean, durable, and a stylish choice.
But hold on a second, have you considered expansion gaps?
Now, you might be wondering, “Do I need them for vinyl flooring?“
Yes. When installing vinyl flooring, an expansion gap must be created. We’ll break down why.
Unlike a nail or glue-down floor installation, floating floors act as one entire unit. Because each plank is linked to its neighbor and not secured to the subfloor. And that’s why including suitable expansion space is essential for successful flooring.
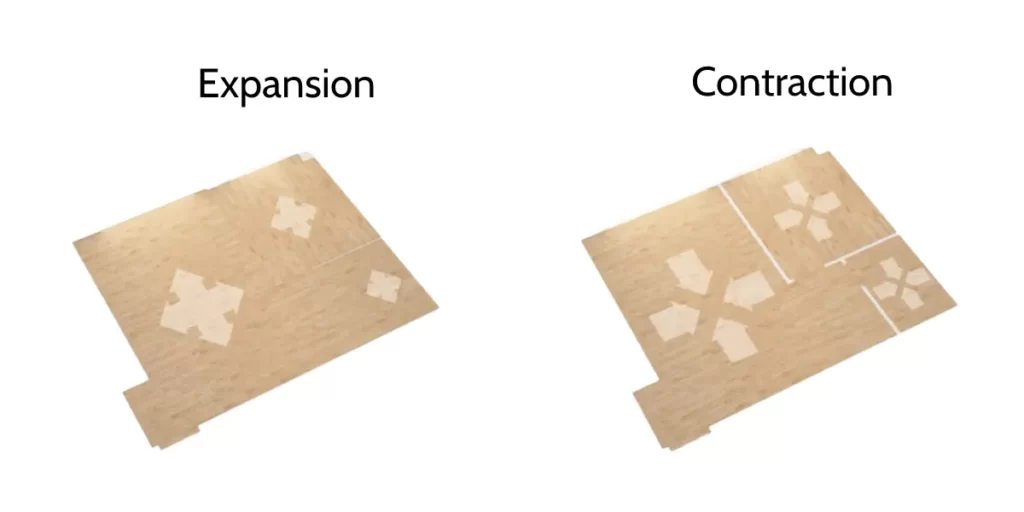
According to the National Wood Flooring Association, the expansion and contraction of vinyl flooring is a natural consequence. Which happens with changing temperatures.
Thus, you must provide an expansion gap around the perimeter of the space. And also at every wall-floor junction.
If you don’t leave space for expansion, it is possible that the flooring may buckle or warp.
Continue with the article to know what expansion gaps are, and why they matter for your vinyl floors. Also, how to go about incorporating them into your installation process.
What is an Expansion Gap & Why Do You Need One?
An expansion gap is a space between flooring and a wall left during installation.
We need an expansion gap because vinyl flooring is all hygroscopic. It means that these types of flooring can expand with any increase in moisture and contract with any decrease. And this occurs with the changing of seasons.
Due to this fluctuation, floating floors compound over the entire run of each board.
In a room, expansion occurs toward the perimeter. While contraction occurs toward the center and away from the perimeter. So, there is a space between the flooring and all vertical objects for the flooring to expand.
How Much Expansion Gap Does Vinyl Flooring Need?
Vinyl flooring comes in many types, each with its expansion and contraction characteristics.
How much expansion space you include depends not only on your installation size. But also unexpected seasonal changes.
If you install when humidity conditions are low, wood flooring will likely gain moisture. And expand during the more humid seasons. Generally, you should create more expansion space using expansion spacers or transition moldings.
Need to provide expansion space not only around the room’s perimeter. But also at the base of all vertical objects. Such as cabinets, pipes, columns, fireplaces, and vents.
Vinyl Composite Tile (VCT)
Also, loose-lay vinyl planks are a cutting-edge alternative to traditional flooring options. Because of their unique installation method. The tiles may be installed into the subfloor without glue and remain in place for quite some time.
Generally, no expansion space is required when laying loose vinyl planks. But for the sake of safety, you can leave 0.25 to 0.5-inch space at the floor’s perimeter when laying tiles. Usually, the tiles won’t expand or shrink, no matter how hot or cold the room becomes.
Unlike other flooring options, loose-lay vinyl planks are impervious to humidity. And temperature fluctuations are expected in the home.
Luxury Vinyl Flooring (LVF)
It is recommended that luxury vinyl flooring and the wall have an expansion gap of three to seven millimeters. Additionally, these vinyl floors are waterproof and look like wood. Because it extends less than other flooring choices, a smaller expansion gap is suggested.
Sheet Vinyl Flooring
For traditional sheet vinyl to remain in place, adhesive is required. The material can expand despite the glue, even if it is not moved or lifted. For this reason, traditional sheet vinyl should have an expansion gap of approximately 7mm.
Note: For installations over 30 feet, extra expansion spaces are needed. For every ten feet, one-sixteenth of an inch is added.
How to Create Expansion Gaps for Vinyl Flooring?
Supplies Needed:
- Vinyl flooring
- Spacers (small blocks or wedges)
- Measuring tape
- Pencil
- Saw or utility knife
Step 1: Measure the Room
Start by measuring the entire room where you plan to install vinyl flooring. Account for any irregularities in the room’s shape.
Step 2: Determine Expansion Gap Size
Decide on the size of the expansion gap you need. Typically, a gap of about 1/4 to 3/8 inches is recommended. This allows the vinyl to expand and contract with changes in temperature and humidity.
Step 3: Mark the Wall
Using a pencil, mark the measured expansion gap distance on the walls. This provides a visual guide during the installation process.
Step 4: Start with the First Row
As you lay the first row of vinyl planks or tiles, place spacers between the flooring and the wall. These spacers will maintain the necessary gap for expansion.
Step 5: Continue Adding Spacers
For each subsequent row, continue adding spacers along the edges to ensure a consistent expansion gap. Even spacing is essential for uniform expansion.
Step 6: Cut Around Obstacles
Use a saw or utility knife to cut vinyl flooring around obstacles such as door frames or vents. Be sure to leave an expansion gap around these areas.
Step 7: Complete the Installation
When you reach the final row, measure and cut the last pieces to fit. Maintain an expansion gap along the last wall to ensure a uniform look.
Step 8: Remove Spacers
After completing the installation, carefully remove the spacers. This leaves the required gaps around the edges, allowing for proper expansion and contraction.
What Happens If There’s No Expansion Gap?
Suppose a floating floor is forced to fit tightly around an air vent register. And the floor expands with the change of seasons. In this case, the planks around the vent will push against the register and cause the floor to buckle upward.
Similarly, if the floor contracts and begins moving toward the center of the room. The planks along the exterior of the register next to the wall will not have enough space to move inward with the rest of the installation. And will eventually separate.
It may sound dramatic. But with a floating installation, it’s essential to have a free-flowing floor. Not to secure any planks to the subfloor.
In simple words, your vinyl floor will eventually buckle. If there is no expansion gap around the perimeter, this will cause gaps between the planks.
How To Avoid Buckling?
There is a tendency for vinyl plank flooring to buckle, regardless of the installation type. Whether loosely laid, glued down, or clicked together.
If the tiles attempt to expand, but there’s nowhere for them to do so, they buckle. Some tiles move upwards, while others move downwards.
To avoid buckling, ensure you don’t have groundwater slippage in your subfloor. And your vinyl planks are protected from direct sunlight. Because these two factors can cause vinyl floors to buckle.
There are many reasons why your vinyl floor is buckling. So it is worth understanding the causes to help you take the necessary precautions to stop it.
Thus, please read the article below to know why your vinyl plank floor is buckling and how to fix it.
Must Read: 5 Reasons Why Your Vinyl Plank Floor Buckling (Guide To Fix It)
What Causes Gaps in Vinyl Plank Floors?
Buckling is just one of the issues that could cause gaps in vinyl floors.
Using low-quality adhesives. Failing to properly secure the floor after installation. Dragging heavy objects over it. Leaving an excessive perimeter expansion area. Exposing it directly to the sun is another issue.
You can read about these issues and their solutions in detail in the below-mentioned article. This article also provides information on how to fix gaps in different types of vinyl plank flooring as well.
Must Read: How to Fix Gaps in Vinyl Plank Flooring? (5 Easy Steps)
Vinyl Installation Do’s and Don’ts
Do’s
- Your floor and room must be acclimated before installing new flooring.
- For click-lock vinyl, leave an expansion gap of three to seven millimeters.
- The subfloor needs to be leveled properly.
- If you are installing over concrete, use a vapor barrier.
- Be prepared for bumps.
- Small boards should be used to end rows.
- Make sure the door jambs and trim are cut.
- Always read the instructions that come with your product.
Don’ts
- Using fancy equipment
- Don’t install vinyl or LVT tiles with an adhesive that isn’t approved for the purpose.
- Walk on your vinyl flooring after installation.
- Installing planks by hammering them.
- Using pins to secure vinyl planks around the perimeter.
Read More on Vinyl Floors
- 5 Reasons Why Your Vinyl Plank Floor Buckling (Guide To Fix It)
- How to Fix Gaps in Vinyl Plank Flooring? (5 Easy Steps)
- Does Vinyl Flooring Fade in the Sun? (6 Ways to Prevent From Fading)
- How to Fix Vinyl Flooring Seams? (A Step By Step Approach)
- 5 Best Ways to Remove Burn Marks From Vinyl Floors (Must-Try!)


Thanks for the tip about how I should also have a vapor barrier when planning to install vinyl plank floors. I’m interested in looking for a good vinyl plank flooring contractor soon because I think that will be the right kind of flooring to go for in my living room. The scratch resistance will surely be necessary to have because I have a dog at home with pretty touch claws.