Ever experienced that unsettling sensation of your floor vibrating? Or shaking beneath your feet as you take a stroll through your home?
You’re not alone. Many of us have wondered, “Why does my floor shake when I walk?” It’s not just a quirky phenomenon.
There are reasons behind it. And understanding them can help address any concerns you may have about your home’s stability.
Generally, this happens with uneven or weak subflooring. And sometimes, it’s just a matter of loose floorboards or joists.
Also, subfloors installed with nails rather than wood screws or construction adhesive.
Can cause your floors to shake as they become loose over time.
So, certain types of movement may cause the floor to vibrate.
Resolving the problem requires getting to the root of the problem.
Before searching for a solution, one must understand what causes the problem.
Although hiring a professional to resolve this issue is recommended.
But, a capable DIY enthusiast can also reduce vibrations by repairing suspect areas themselves.
Common Causes that Make the Floor Shake
House Settling
As houses age, they tend to settle a bit. It’s like the house is finding its comfy spot on the ground.
This setting can lead to a bit of bounce on the floors.
Subfloor Problems
The subfloor is the layer under your flooring. If it’s not level or strong enough, it can cause the floors to feel bouncy.
Think of it like the foundation – if it’s not solid, the floors won’t be either.
Also See: Can Mold Grow Under Vinyl Plank Flooring? (Answered)
Loose Floorboards
The actual parts that make up your floors, like floorboards, can become loose over time.
When these parts aren’t snug and secure, they contribute to that bouncy feeling.
Poor Construction or Materials
Sometimes, if the floors weren’t built well in the first place.
Or if low-quality materials were used, you might end up with bouncy floors. It’s like a weak foundation from the start.
Trusts or Joists That are Cracked
Damaged floor trusts and joists weaken the support that holds the subfloor up. A weakening reduces stiffness but does not end sponginess.
The damage is more severe when many framing members lie adjacent.
There can be many reasons why cracks form. These implements are usually worn out when they are subjected to excessive weight.
There is a possibility that such damage can occur when a building contractor places a heavy pellet of tiles towards the center of the floor.
Termites Might Ruin Floor Trusses or Joists.
It is common for termites to use wood as a source of food, but they also tend to take away the strength of the wood.
The phenomenon may continue as long as the wood’s power is not compromised.
Eventually, the floor will flex and appear spongy due to this damage.
As soon as possible, this issue should be addressed to prevent the floor from failing.
A Step-by-Step Guide to Fix Floor Vibrations
Fixing floor vibrations may take a bit of time and effort, but by following these simple steps, you can make significant improvements.
Step 1: Identify the Problem Areas
Walk around your home and pay attention to where the floor feels the most shaky or bouncy.
Identifying specific spots and marking them will help you target your efforts more effectively.
In case you cannot find the area that needs to be repaired.
Place a half glass of water on a table, walk or hop on the floor, and see where the water vibrates the most.
By doing this, you can determine which part of a room needs to be repaired.
Step 2: Tighten Loose Nails or Screws
Get down on the floor and check for any loose nails or screws in the problematic areas.
Tighten them up using a screwdriver or a hammer. This simple fix can make a noticeable difference.
Step 3: Secure the Subfloor
If your floor sits on a wooden subfloor, secure any loose sections with screws or nails. This stabilizes the base and reduces vibrations.
Step 4: Reinforce Weak Joists
Strengthen any weak joists by adding extra support. Use brackets or blocks to reinforce the horizontal beams that support your floor.
Step 5: Insert Shims
Fill gaps between the joists and the subfloor with shims.
These are like small wedges that prevent unnecessary movement and create a more solid foundation.
Step 6: Upgrade Flooring Materials
Consider upgrading your flooring materials, especially if they are thin or of low quality.
Thicker, sturdier materials can contribute to a more stable floor.
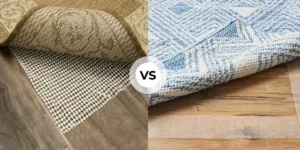
Step 7: Use Rugs or Carpets
Strategically place rugs or carpets in areas where you feel the most vibrations.
These act as shock absorbers, adding an extra layer of stability.
Step 8: Install Resilient Underlayment
Lay down a resilient underlayment beneath your flooring.
This extra layer helps absorb impact and minimizes vibrations, providing extra support.
Step 9: Seek Professional Advice
If the vibrations persist. Or if you’re unsure about the structural aspects, consider consulting a professional.
FAQs: Why Does My Floor Shake When I Walk?
How do I stop my floor from shaking?
To stop your floor from shaking, you can start by tightening loose nails or screws in the problem areas.
Secure the subfloor with screws or nails to make it more stable. Reinforce weak joists with extra support using brackets or blocks.
Fill gaps between joists and subfloor with shims. Use rugs or carpets to absorb vibrations.
These steps should help make your floors more solid and less shaky.
What causes a bouncy floor?
Generally, subfloors can loosen over time if they are nailed instead of screwed or fixed with construction adhesive.
As a result, certain types of movement may cause the floor to vibrate.
If a subfloor is loose, a washing machine can cause vibrations, or you may experience vibrations when walking on it.
Is it normal for a floor to bounce?
Not. There are only two things that could make your floor bounce.
One is when your subfloor is nailed rather than screwed. Or fixed with construction adhesive.
Secondly, when your subfloor has pretty serious moisture problems.
Check Out More Articles Related to Flooring
- Cork vs. Foam Underlayment: Which is Right for Me?
- Do You Put Vinyl Flooring Under Appliances? (Answered & Explained)
- 4 Best Ways to Cover Gap Between Floor and Wall (Must-Try!)
- Can I Use Laminate Flooring On Walls? (Installation Guide Included)
- How to Remove Scuff Marks from Laminate Flooring? (4 Helpful Solutions)