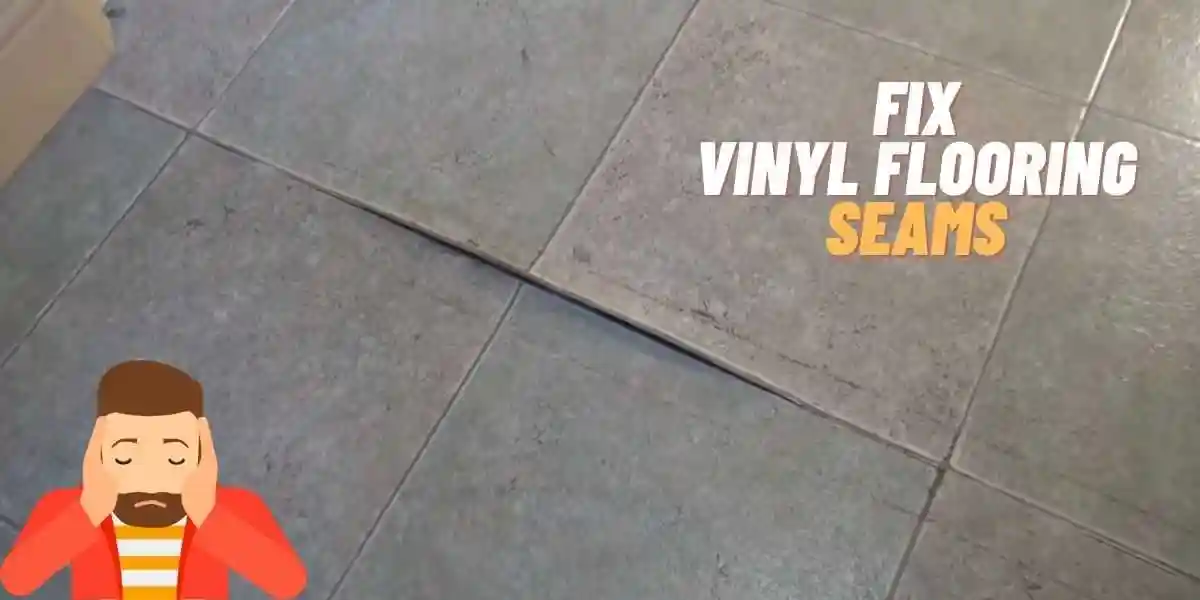
For many homeowners, seams in vinyl floors have been a concern.
Because seams can allow moisture to penetrate, which could lead to mold and mildew growth.
But, there is a simple solution to this problem.
Repairing vinyl flooring seams is a simple process that will not take up a lot of time.
It won’t just be the seams that will be repaired, but also the floor will look like new.
Having said that. Before learning how to fix vinyl flooring seams, you must first understand why the floor seams.
Why does your Vinyl Floor Seams?
Despite being overlooked, vinyl flooring seams can be repaired with the right tools and materials.
But, the main reason why vinyl floors buckle and roll is that vinyl floors use adhesive to stick in position.
As time passes, the adhesive loses its strength, causing the vinyl floor to wobble.
The dried adhesive is not the only reason for vinyl flooring seams to peel.
There are several equally valid reasons. They include:
1. Not Reading Instructions
Many of us make the mistake of not reading the instructions before installing our floors.
Reading a manual will make you more confident about the process of installing a floor.
Each flooring product has instructions for securing it properly.
Solution: Read the user’s instructions to know the perfect temperature range in which the product should be installed.
Because if you install vinyl flooring when the temperature is too high or too low in a room, the vinyl will not adhere to the floor.
2. Installing On An Uneven Subfloor
A second reason is installing vinyl flooring on an uneven subfloor, which might cause the vinyl to grow mold, crack, or pop up.
All these reasons make vinyl flooring prone to seams.
Solution: Ensure the sub-flooring is even and dry so the adhesive adheres firmly and doesn’t lift the vinyl.
3. Using Low-Quality Adhesive
Your vinyl flooring may also develop seams over time if you use a low-quality adhesive during installation.
Using the wrong adhesive during installation could cause the flooring not to stick properly. Resulting in seams developing over time.
Solution: Make sure you use an adhesive that is specifically designed for vinyl floors.
See Also: Best Glue for Vinyl – Evaluating the Best Adhesives for Vinyl Surfaces
4. Not Allowing the Floor to Settle
You might not be allowing your vinyl flooring to settle properly after installation.
Allow your vinyl flooring to adjust to the room’s environment before installing it.
It is another factor that could be causing seams in your vinyl flooring.
Solution: Give your vinyl flooring at least 12 hours, ideally 24 hours, to settle after installation.
Must See: Do I Need Expansion Gaps for Vinyl Flooring? (Explained)
Pros and Cons of Sealing Your Floor
Pros
- Sealing your floor will help it stay fresh and new for a long time.
- Stains and spills will also be less likely to damage it.
- Stains and scratches become less likely to affect the flooring.
- Makes cleaning easier.
Cons
- Sealing a floor can be very expensive, especially if you hire a professional.
- Sealing makes it difficult to maintain your vinyl floor’s finish if it’s not done correctly.
- Increases difficulty in removing tiles later.
Here’s How to Fix Vinyl Flooring Seams
Fixing vinyl flooring seams is not a difficult task.
But, if you are not familiar with the process of repairing vinyl flooring seams, it might seem complicated.
Supplies Needed
The first step in fixing a vinyl floor seam is to get all the necessary tools for the job.
- Hair drier
- Putty knife
- Vacuum cleaner
- Flooring adhesive
- Vinyl floor seam sealer
- Soft cloth
- Mop
Step 1: Clean the Floor
Before fixing seams in vinyl flooring, you should completely clean the flooring with a vacuum or wet mop.
If your flooring has seams, dust, hair, and other debris may have accumulated in them.
Step 2: Heat the Area
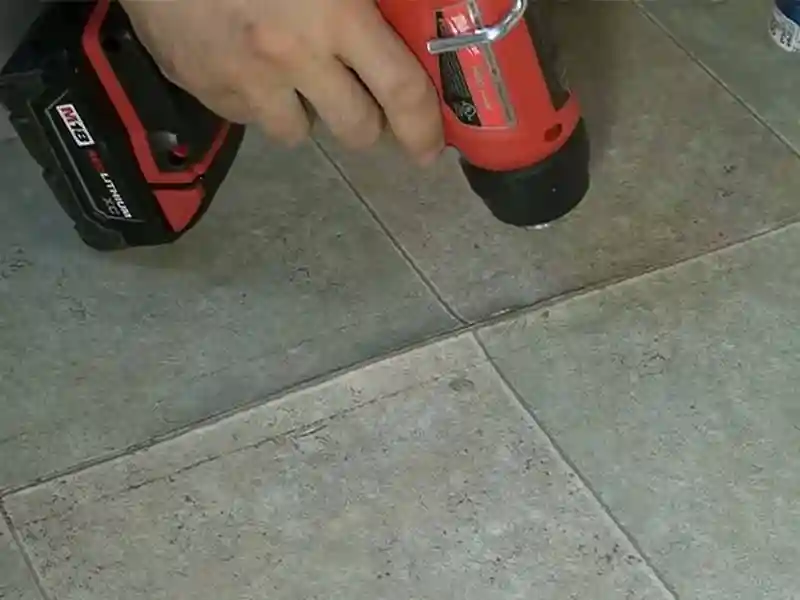
Use a heat gun to warm up the flooring around the elevated seams.
It will soften the flooring and make it easier to work with. If you don’t have a heat gun, use a hairdryer.
Step 3: Scrape out the Old Adhesive
To begin, use a putty knife to scrape off the old adhesive. The best tool to use is a plastic scraper.
Don’t use a metal scraper as it can damage the flooring.
Secondly, you should rinse the flooring with water and a mild detergent to loosen the remaining adhesive.
You may need to repeat this process until all the adhesives have been removed. It’s okay if a little glue is left behind.
Step 4: Vacuum the Area
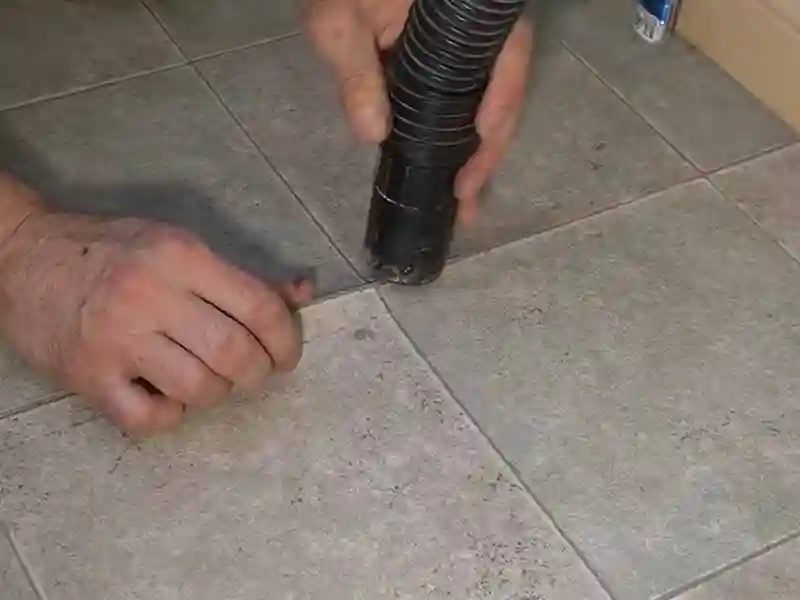
After scraping, clean the area thoroughly using a vacuum cleaner.
Once you have vacuumed all the dirt, turn off the vacuum and remove any visible dirt from the surface of your vinyl floor with a cloth or paper towel.
Step 5: Apply Adhesive
After that, apply the adhesive to the vinyl floor by using a putty knife and spread evenly across the surface in one direction only (lengthwise).
Make sure that you cover all areas, including the corners and edges.
Press the vinyl back into place and remove excess adhesive with a soft cloth.
Step 6: Put Some Weight on it for 12hrs
To weigh down the vinyl, press the vinyl back into place and remove excess adhesive with a soft cloth.
Place a heavy object on top, such as a stack of books or a box.
Step 7: It’s Done
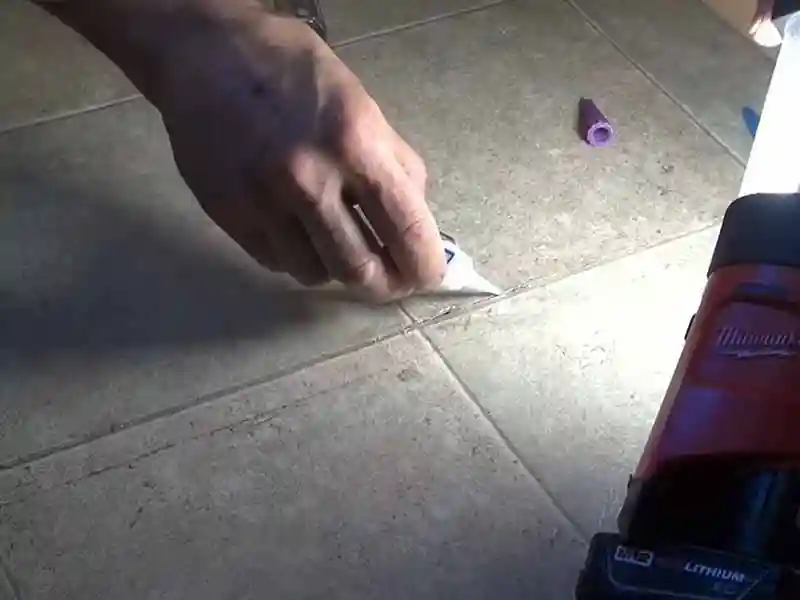
And the process is complete. The only final step that is remaining is to use a vinyl flooring seam sealer.
Most vinyl floor seam sealers come with an applicator.
Just follow the instructions on the package, and don’t forget to wipe off any spills.
Now, wait until the area has dried completely and set up before walking on it.
FAQ: How to Fix Vinyl Flooring Seams?
How do you fill gaps in vinyl flooring?
There are several ways to fill gaps in vinyl flooring.
You can use a filler compound, which is an adhesive that will stick to the vinyl and fill any gaps.
You can also use caulk, which is a sealant that will also adhere to vinyl and fill any gaps.
Many people choose to just leave the gap unfilled, but this may cause problems with the floor in the future.
Do vinyl flooring seams require extra maintenance?
Vinyl seams don’t need extra maintenance.
But they do need to be repaired right away since they could cause serious damage to your flooring in the future.
Read More on Vinyl Floors
- Can you Caulk Around Vinyl Flooring? (All You Need to Know!)
- How to Fix Gaps in Vinyl Plank Flooring? (5 Easy Steps)
- 5 Reasons Why Your Vinyl Plank Floor Buckling (Guide To Fix It)
- 5 Best Ways to Protect Vinyl Flooring From Heavy Furniture (Must-Try!)
- How to Clean Shaw Vinyl Plank Flooring? (Beginners Guide)