Vinyl flooring is durable, trendy, and super easy to maintain.
People love it for its affordability and this flooring is highly water-repellent. It also adds a touch of class to any home by adding that realistic wood grain look.
Like all floors, vinyl flooring requires proper maintenance and care. Regular cleaning and waxing are required for proper maintenance. It is susceptible to scratches and dents.
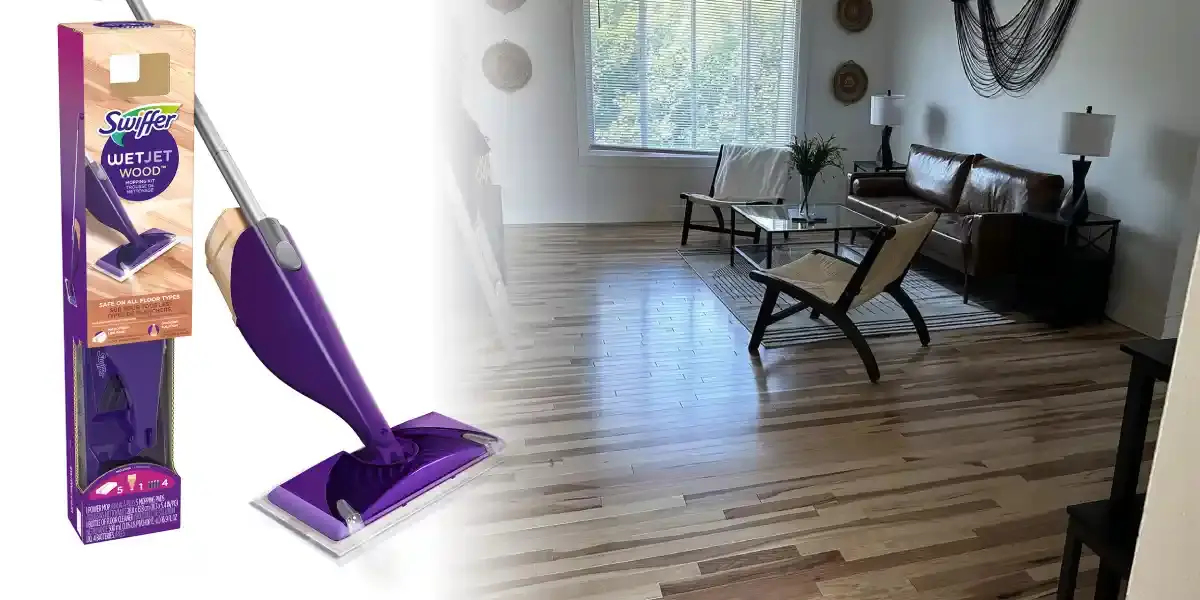
A common question when cleaning vinyl floors is: Can you use a Swiffer on vinyl plank flooring?
Yes. Swiffer is a safe and effective cleaning option for vinyl plank flooring. Its gentle cleaning process won’t harm the floor. It also maintains the durability and appearance of vinyl planks.
I’ve used it myself plenty of times, and let me tell you, it’s a breeze.
Just grab one of those dry Swiffer cloths and give your floor a once-over. It picks up all the dirt and dust without leaving behind any streaks or residue.
In this article, we will explain how to use a Swiffer step by step on vinyl plank flooring. So, keep reading.
Pros and Cons of Using Swiffers on Vinyl Plank Flooring
Pros
- With Swiffers, vinyl plank flooring owners can clean their floors quickly and efficiently.
- For busy households, Swiffers are an ideal way to remove dirt, dust, and pet hair.
- It’s a versatile cleaner that can tackle spills, stains, and routine maintenance.
- Swiffers are lightweight, making them easy to handle and maneuver for efficient cleaning.
- By using this, homeowners can easily maintain vinyl plank flooring without much effort.
Cons
- This cleaning solution could dull vinyl plank flooring over time, if not rinsed.
- In some cases, stubborn stains or sticky spills need more manual effort.
- Some areas are left uncleaned because Swiffer models can’t reach tight corners.
Precautions to Take While Using Swiffer on Vinyl Plank Flooring
- Choose the Right Cleaning Solution: You should avoid harsh chemicals or abrasive cleaners. Because it can damage the floor’s finish. Stick to a pH-neutral cleaner to keep that vinyl surface looking its best.
- Check for Manufacturer Recommendations: Check out what the manufacturer says about your vinyl plank flooring. They might have specific cleaning tips or rules. You should follow their instructions for the best care.
- Prevent Excess Moisture: While vinyl plank flooring is water resistant, excessive moisture can be damaging. Don’t soak that Swiffer pad – keep it reasonable. And if there’s any extra moisture hanging around on the floor, wipe it away quickly.
- Address Spills Promptly: If a spill occurs, address it promptly to prevent potential staining or damage. You can clean up spills with the Swiffer by using a damp pad, but not soaking wet.
- Avoid Excessive Pressure: Well, as you know vinyl plank flooring is durable, but it’s not invincible. If you apply excessive pressure during cleaning, it can cause scratches or dents. So, don’t do this, you should clean it gently.
How to Use a Swiffer on Vinyl Plank Flooring? (Step-by-Step)
Step 1: Gather Your Supplies
- Swiffer Mop
- Swiffer Pads
- Cleaning Solution
- Broom or Vacuum
- Microfiber Cloth (Optional)
Step 2: Prepare the Area
Before cleaning your vinyl plank flooring with a Swiffer, it is important to prepare the area.
So, you should clear obstacles and furniture from a cluttered workspace. This not only makes things efficient but also ensures safety.
Then, clean the area by sweeping or vacuuming the floor to remove loose dirt, dust, and debris. This step prevents particles from scratching the vinyl surface during the mopping process.
By doing this, you can create a safer environment. Besides, the Swiffer can cover the entire floor without interruption.
Step 3: Attach a Clean Swiffer Pad
Let’s prep that Swiffer for action! Attach a clean, compatible Swiffer pad to the mop head. If using a reusable pad, ensure it’s free of dirt and debris.
For disposable pads, confirm they match your Swiffer model. The key to a top-notch cleaning session is to use a spotless pad, stopping dirt from spreading.
Step 4: Apply Cleaning Solution
Now, it’s time to apply the solution. Grab a Swiffer-friendly cleaning solution or something gentle on vinyl.
Then, apply it lightly to your vinyl plank flooring, but don’t go overboard. Because too much moisture can cause problems like warping.
With this step, you prepare your vinyl for a powerful clean that breaks down dirt and stains.
Step 5: Start Mopping
Start mopping the vinyl plank flooring with the Swiffer. Move the mop in smooth, even strokes, following the natural lines of the planks.
Begin in a corner and shinny your way toward the exit – we want to keep that freshly cleaned floor untouched.
Step 6: Address Spills and Stains
Vinyl flooring can be difficult to remove spills and stains, but it’s not impossible. Apply a bit of extra cleaning solution directly to the affected area.
Then, allow the solution to sit for a moment to break down the stain. After that, use the Swiffer to gently agitate and clean the spot. Finally, wipe the area with a clean cloth.
Step 7: Inspect and Dry
After Swiffer mopping, check for any spots you might have missed or any issues popping up. Let the floor air dry or grab a clean, dry microfiber cloth to wipe away any leftover moisture.
This last move ensures a thorough clean, no water damage, and your floor shining without a streak in sight.
Check Out More Articles Related to Floorings:
- Can You Use Pine Solution for Vinyl Flooring? (Answered!)
- Can You Nail Down Laminate Flooring? (Answered)
- A Guide to Remove Sticky Residue from Laminate Flooring