Vinyl flooring is a great option for people looking for a cheap flooring option.
It is also a great choice for homes with children and pets because it is durable and easy to clean.
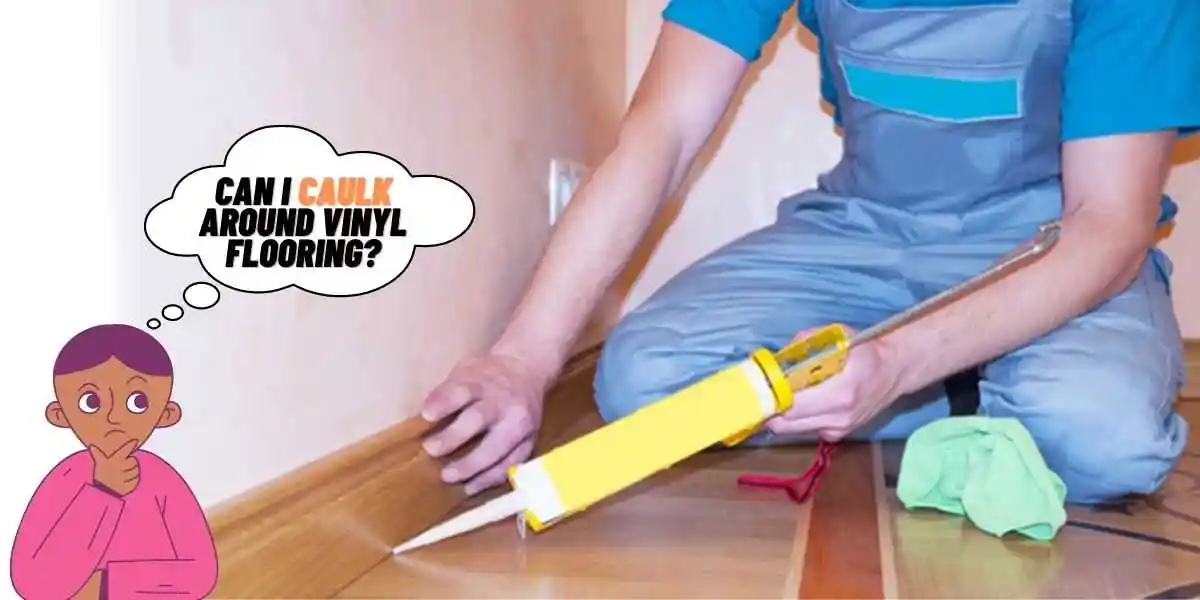
But what about the caulking?
Caulking around vinyl flooring is a smart move, especially in moisture-prone spaces like bathrooms and kitchens.
As caulk can create a water-resistant barrier, safeguarding your flooring from potential damage.
To do it right, ensure the area is clean and dry, then apply the caulk carefully for a neat finish.
This not only boosts the longevity of your vinyl flooring but also enhances its appearance.
Moreover, there are many benefits to caulking that you may not even be aware of.
For instance, it can prevent gaps in your vinyl floor from occurring. Due to moisture problems, weather changes, or incorrect installation.
For more details, please read our guide on “Can you caulk around vinyl flooring?”
The guide also explains how to caulk your vinyl floor.
As well as the most common mistakes people make while caulking their floors. And how to avoid them.
But first, you should know what type of caulk is best for your vinyl flooring.
What Type of Caulk is Best for Vinyl Flooring?
Caulking around your vinyl flooring is a good idea to keep those gaps sealed up, but choosing the right caulk can be a bit of a head-scratcher.
Before deciding what type of caulk is best for you, it will be wiser to learn about each kind and choose the one that’s best for your vinyl flooring.
Here’s the lowdown:
1. Acrylic Latex Caulk (Best for Indoor Use)
Acrylic latex caulk is your buddy for indoor applications. It’s flexible and versatile, working well on floors, walls, and ceilings.
Plus, no special skills or tools are needed for this application.
It’s easy to apply and dries quickly, so it’s ideal if you need a quick fix.
It’s also mold and mildew-resistant, so it’s a great choice for use in bathrooms and kitchens.
2. Silicone Caulk (Best for Indoors & Outdoor Use)
Silicone caulk is your go-to for both indoor and outdoor fixes.
It’s super durable, doesn’t shrink or crack when wet, and can handle kitchen and bathroom use like a champ.
It’s also resistant to mildew, making it a perfect choice for damp areas.
Plus, it comes in a wide variety of colors, so you can easily match it to the existing paint job.
3. Foam Caulk (Best for Indoor Use)
Foam caulk is a game-changer; it expands to fill gaps and cracks, making it water-resistant and easy to apply.
It is also durable, lasting for years, and holding up to wear and tear.
Additionally, it is relatively inexpensive compared to other caulks.
4. Butyl-Rubber Caulk (Best for Outdoor Use)
Butyl rubber caulk is the hero for tackling leaks and cracks around windows and doors, creating a flexible watertight seal.
It’s designed for outdoor use and can withstand extreme temperatures, making it the best choice for sealing outdoor gaps and cracks.
It’s also resistant to mold and mildew, making it a great sealant for outdoor applications.
Also Check: What is the Difference Between Caulk & Sealant?
Pro Tip: If you’re not sure which one to pick, acrylic latex caulk is a safe bet. It can handle temperature and humidity changes like a pro.
Remember, caulking vinyl flooring seams isn’t a must, but it’s a good idea for added water protection.
If you’re aiming for a waterproof seal, go for silicone or latex caulk; they’re more durable.
However, keep in mind that caulking is a temporary solution.
To tackle the root issue of gaps in your vinyl flooring, you’ll want to figure out why they’re happening in the first place.
Also Check: How to Fix Gaps in Vinyl Plank Flooring? (5 Easy Steps)
Reasons Why Vinyl Flooring Develops Gaps
1. Moisture Issues
Moisture is one of the reasons vinyl flooring develops gaps.
Water weakens the adhesive that holds vinyl to the backing, allowing it to develop gaps, warp, buckle, and sink.
Solution: You need to check for molds and mildew as they are indicators of moisture/humidity issues on the floor.
Complete Guide: Can Mold Grow Under Vinyl Plank Flooring? (Answered)
2. Avoid Exposure To Sunlight
Direct exposure to sunlight can heat surfaces, which can lead to excessive expansion or contraction that results in gaps.
Solution: To limit the damage to floors adjacent to windows, hang blackout and thermal curtains or apply a UV film or glass tint directly to the windows.
Complete Guide: Does Vinyl Flooring Fade in the Sun? (6 Ways to Prevent From Fading)
3. Not Using High-quality Adhesive
Another reason is that low-quality adhesives cannot withstand harsh weather conditions, such as extreme temperatures and heavy loads, which can cause gaps to form.
Solution: Ensure that you use an adhesive designed specifically for vinyl floors.
Also See: Does Glue Down Vinyl Flooring Expand? (Explained)
4. Not Using a Roller to Secure the Floor
You may be experiencing expanding gaps in your vinyl flooring because you didn’t use a roller after it was installed.
Using a roller will guarantee the entire surface is secured, resulting in an improved finish.
Solution: As soon as you have installed flooring, roll it with a 100-pound roller to secure it to the subfloor in every area.
5. Leave Gaps at the End of Flooring
The most common mistake people make when laying flooring is not leaving gaps. It may seem illogical to leave gaps to avoid gaps.
However, this allows the vinyl floor to naturally expand and contract as the temperature changes.
Solution: When installing the vinyl flooring, leave between a quarter-inch and a half-inch of space between it and the wall.
Complete Guide: Do I Need Expansion Gaps for Vinyl Flooring? (Explained)
6. Wrong Installation
You may also experience many problems such as discoloration, bulking, and moisture if you install vinyl flooring incorrectly.
Solution: Before installation, read the flooring manufacturer’s installation guide carefully, and if possible, consult a professional.
7. Moving Heavy Objects
Moving or dragging heavy objects over vinyl flooring can also cause gaps.
Additionally, use protective mats underneath the vinyl flooring with a minimum of two inches between them and the edge of your carpeted area.
Solution: To avoid damaging vinyl flooring when you drag a heavy object over it, you should use furniture sliders (or something similar) under the object’s feet.
Complete Guide: 5 Best Ways to Protect Vinyl Flooring From Heavy Furniture (Must-Try!)
Pros and Cons Of Caulking Your Floor
Pros
- Caulking your floor will prevent water damage to floors.
- It is a relatively inexpensive way to prevent water damage.
- It is an easy DIY project that can be completed in less than an hour.
- Increases the lifespan of the floor and makes it more durable.
- Caulking may be able to provide a better seal than other sealing materials.
Cons
- The caulking needs to be replaced periodically as it can dry out and crack over time.
- Changing your flooring can be difficult, and it may leave behind a sticky residue that attracts dirt.
- Due to air bubbles or too much caulk applied at once, this can create an uneven surface.
How To Caulk Vinyl Flooring?
Step 1: Prepare the Floor by Cleaning it
Caulking a floor is a task that needs to be done with care and precision.
One of the most important things to do before caulking a floor is to clean it.
This will ensure that the caulking won’t have any dirt or debris in it, which could lead to problems over time.
Also Check: How to Clean Shaw Vinyl Plank Flooring? (Beginners Guide)
Step 2: Apply a Mask to the Vinyl Plank’s Edges
The edges of the vinyl plank should be masked with a thick layer of painter’s tape before caulking.
If you don’t mask the edges of the vinyl plank, it will be difficult to seal them and you could end up with a mess.
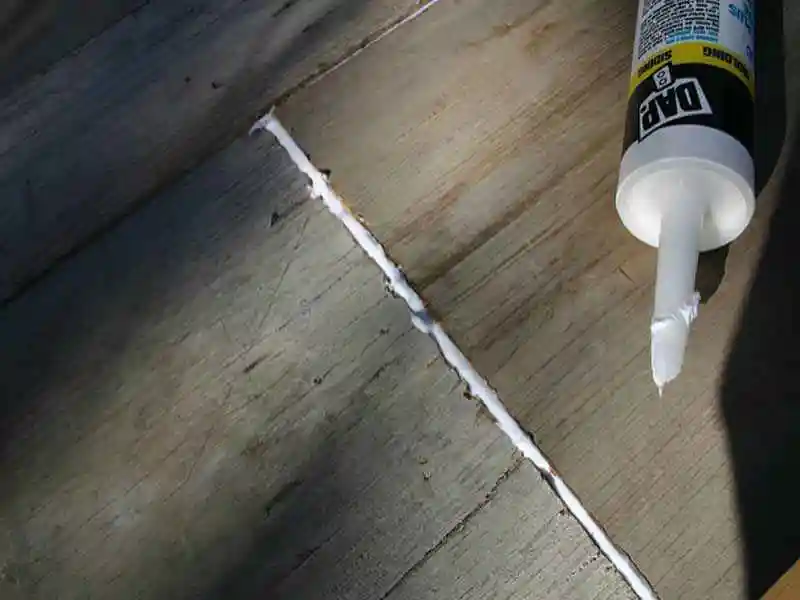
Step 3: Caulk the Gaps
Apply caulk between the planks and ensure you apply it under the holes and gap edges with a putty knife.
Fill the adhesive under the gaps after cleaning the joint.
Step 4: Take Off the Masking Tape
When done, remove the masking tape and use a wet sponge to wipe up any adhesive that may have been dropped or smeared on the floor.
Step 5: It’s done. Let it Dry For a While
Make sure the caulking has hardened before allowing traffic to pass through it.
Follow the manufacturer’s instructions regarding caulking ventilation.
Common Mistakes to Avoid While Caulking Vinyl Floor
The installation process is not complicated, but it is important to avoid making these common mistakes.
- Using the Wrong Type of Caulk: There are different types of caulks, each designed for a specific purpose. Choosing the wrong caulk can cause problems with the joint and weaken it.
- Not Cleaning the Surface Before Caulking: Cleaning the surface before caulking can solve many problems. For example, dirty surfaces may hamper sealants from adhering properly.
- Applying Caulk Too Soon: Caulk must be applied before the floor is installed, or else it will not adhere. If your floor has already been installed, you can remove the vinyl and re-caulk it.
- Not Using Enough Caulk: You must use enough caulk so that there are no gaps between the floor and the caulk; otherwise, water can get in and ruin the flooring.
- Not Installing the Caulk at a 90-Degree Angle: If this happens, the caulk will not be able to hold up against the floor and will start to peel off.
- Using an Old Tube of Caulking: You should not use an old tube of caulk that has hardened. If yours has hardened, throw it away and buy a new tube.
FAQ: Can you Caulk Around Vinyl Flooring?
Can I use Caulk Around the Edges of LVP?
Yes, you can. The caulking will prevent water from seeping through the joint between the LVP and the substrate.
And it will also provide a seal against any insects that might attempt to enter through those joints.
How do you Seal Gaps in Vinyl Flooring?
The first step in sealing gaps is to identify where they are.
It can be done by looking at the joints between the tiles and at any areas where there are seams.
You should also check for any water damage or other signs that indicate that there may have been a leak.
Once you know where these gaps are, you should use a high-quality sealant and spread it evenly over the area using a brush or roller.
Also Check: How to Fix Gaps in Vinyl Plank Flooring? (5 Easy Steps)
How to Know If It Is Time to Replace Your Caulking?
A good way to determine whether it is time to replace your caulking is if it shows signs of wear and tear.
If you see cracks or discoloration, you may need to replace the caulk.
You should also replace your caulk every 3 to 5 years, depending on the type of caulk you use.
Read More on Vinyl Floors
- Can Mold Grow Under Vinyl Plank Flooring? (Answered)
- A Guide to Remove Rubber Marks from Vinyl Flooring
- 5 Reasons Why Your Vinyl Plank Floor Buckling (Guide To Fix It)
- Do I Need Expansion Gaps for Vinyl Flooring? (Explained)