As we all know, vinyl floors are one of the most popular flooring materials today because they are durable, attractive, and practical.
You will be surprised to know that, before installing vinyl flooring we need first to install an underlayment. Why?
Because underlayment plays a significant role in vinyl floor installation. It can protect the floor from subfloor imperfections, reducing noise and vibration.
Plus, it can also cushion the floor and make it more comfortable to walk on.
Well, now you might be thinking about “Does Vinyl Flooring Need Underlayment on Concrete?”
Yes, vinyl flooring generally requires an underlayment when installed over concrete. Underlayment prevents moisture from seeping through concrete and damaging vinyl flooring.
Additionally, it can add a layer of insulation and soundproof the room.
Here we will discuss the types of underlayments and the installation process. With the benefits of underlayment on concrete. So, let’s start.
Do I need an Underlayment on Vinyl Flooring?
Yes, vinyl flooring needs underlayment in moisture areas.
Why?
Well, it protects vinyl from moisture, absorbs noise like a champ, and keeps vinyl level with the subfloor – no wonky floors!
Did you know? It’s not just about protection; underlayment acts like a comfy cushion between the subfloor and your fancy finished floor.
So, pick the right underlayment, my friend! The right one protects and ensures your vinyl is living its best life.
Also See:
- Cork vs. Rubber Underlayment: Which One Should I Choose?
- Cork vs. Foam Underlayment: Which is Right for Me?
Benefits of Underlayment for Vinyl Flooring on Concrete
- Sound Deadening: Sound-reducing underlayment that minimizes impact noise and sound between rooms and floors.
- Extra Cushion: The underlayment is a supportive layer that provides additional cushioning for vinyl floors.
- Cold Blocking: Vinyl flooring on concrete acts as a rugged blocker by providing insulation to reduce cold transfer.
- Moisture Shield: The underlayment prevents moisture from seeping through concrete and damaging vinyl flooring.
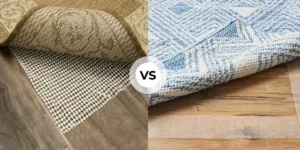
Types of Underlayment for Vinyl Flooring on Concrete
Cork Underlayment (Suitable for LVP)
Cork is an excellent choice for vinyl floors and tiles. It is specially used for LVP (luxury vinyl plank).
Also, it is only available in cork rolls or as a vapor barrier and moisture-resistant coating for concrete. Well, it is an insulator and an environmentally friendly underlayment.
Moreover, it offers top-notch sound insulation and is ideal for mold, mildew-prone areas, and allergy sufferers.
It is also pet-friendly, as it is non-toxic and hypoallergenic. Plus, it is also very affordable and easy to install.
Rubber Underlayment (Suitable for LVP and LTP)
Rubber underlayment provides excellent sound insulation and is durable. It is especially suitable for LVP (luxury vinyl plank) and LTP (luxury tile plank).
It reduces impact noise and vibration. In addition, it provides moisture resistance. It is cushioned underfoot for better walking comfort.
Furthermore, it is also cost-effective and can be used in both residential and commercial applications. When installing vinyl flooring over concrete, rubber underlayment is a reliable option.
Foam Underlayment (Suitable for LVP and LVT)
Foam is the most common underlayment for vinyl floors. It provides cushioning and insulation for plywood subfloors at a reasonable cost. There may be better options than this if you live in a moist climate.
It is lightweight and can be easily installed and is made of polyethylene or polypropylene. It reflects sound, cushions, and insulates, and comes in different thicknesses to suit your needs.
Plywood Underlayment (Sheet Vinyl)
Underlayment made from plywood can provide a smooth and level surface for vinyl flooring on concrete. It creates a protective layer between concrete and vinyl, blocking moisture. This underlayment is suitable for vinyl sheet flooring.
Moreover, it fills in small gaps and imperfections. When installing vinyl flooring over concrete, use plywood of the right thickness and type.
Step-by-Step Guide to Installing Underlayment on Concrete
Step 1: Gather the Necessary Materials and Tools
Materials:
- Underlayment (such as plywood, foam, cork, etc.)
- Concrete screws
- Adhesive
- Underlayment tape or seam adhesive
- Moisture barrier (if needed)
Tools:
- Measuring tape
- Utility knife or saw
- Trowel or adhesive spreader
- Hammer
- Straightedge or level
- Broom or vacuum cleaner
- Safety goggles and gloves
Step 2: Prepare the Concrete Surface
The best way to clean concrete surfaces is to scrape or vacuum them to remove debris, dust, and adhesive residue.
Additionally, you can use an abrasive cleaner or degreaser to remove stubborn stains.
Furthermore, cracks and gaps should be repaired with a concrete patching compound.
If there are any raised spots or ridges, grind them down to create a flat surface.
Underlayment installation requires a smooth concrete surface.
Step 3: Check for Moisture
Simple moisture tests can be performed on concrete surfaces to determine if they are moist.
Also, ensure all edges are sealed with plastic sheeting, and let it rest for 24-28 hours.
If condensation or moisture accumulates beneath the plastic, remove it and check for leaks.
To prevent damage to underlayment, use a moisture barrier when significant condensation occurs.
Moreover, use adhesive to secure the barrier, then cover it with a thin layer of flooring. It is important to seal all edges so moisture does not seep through. Regularly check the barrier to ensure it is still intact.
Step 4: Measure and Cut the Underlayment Material
Using a tape measure, measure the length and width of the room. It is important to take the correct measurements to cut the underlayment correctly.
It would be best if you rolled the underlayment from corner to corner. Make sure the underlayment is cut around obstructions, such as doors and vents. It is permissible to expand by about 1/4 inch.
Step 5: Lay the Underlayment
Underlayment should be placed on the concrete in one corner of the room and rolled up until it covers the floor.
Sealing seams and pin-tight edges with duct tape or adhesive is essential.
After installing the underlayment, clean the floor by sweeping and vacuuming to remove debris. It is important to inspect the underlayment for wrinkles, bubbles, and other imperfections.
Step 6: Secure the Underlayment
Underlayment sheets should be parallel, with about 6 inches between seams. Apply concrete screws or adhesives designed for concrete applications to the wood-based underlayment. Check the underlayment for loose areas before installing the finished flooring.
Step 7: Check for Levelness
Before installing the underlayment:
- Check the concrete surface for levelness using a straightedge or leveling tool.
- Please place it in various spots across the floor to identify any high or low areas.
- Make sure uneven concrete surfaces are leveled before installing underlayment and flooring.
Step 8: Fill Gaps and Seams
Use a seam adhesive or tape designed for the specific material to fill gaps and seams in the underlayment.
It is possible to achieve a tight and secure bond by adhering adhesive along seams or edges. Follow the manufacturer’s seam sealing recommendations when installing foam or cork underlayment.
Step 9: Allow the Underlayment to Acclimate
The underlayment should acclimate to the room’s humidity and temperature. It will adjust to its surroundings after installation, preventing expansion and contraction. Additionally, properly acclimated underlayments are required for successful flooring installation.
Maintenance and Care for Vinyl Flooring with Underlayment on Concrete
- Regular Cleaning: Keep your vinyl floors clean by regularly sweeping or vacuuming to remove grit and small particles. Mop the surface with a damp mop and mild vinyl cleaner to prevent scratches.
- Protection of Furniture: Under furniture legs, place protective felt pads to prevent scratches and dents. It is also recommended to replace them if the felt wears out. You can extend the life of the pads by vacuuming and dusting regularly.
- Moisture Control: Underlayment should contain a vapor barrier to prevent moisture from entering the flooring. Additionally, a vapor barrier can also help to reduce noise transfer between floors.
- Using the Right Cleaning Products: Follow the manufacturer’s instructions for choosing the right cleaning product. Check the ingredients of cleaning products to ensure they do not contain harsh chemicals.
- Furniture Guardians: Place felt pads under furniture legs to prevent scratches and dents. A little protection goes a long way.
FAQs Does Vinyl Flooring Need Underlayment on Concrete
Can I install vinyl flooring directly on concrete without underlayment?
Yes, you can install vinyl flooring directly on concrete without an underlayment. But, it’s important to ensure that the concrete surface is clean, dry, and level.
Is underlayment necessary for luxury vinyl planks?
Underlayment is not always necessary for luxury vinyl planks (LVP). LVP is usually installed on a clean, level, and smooth subfloor like concrete or plywood.
But, if you want a more comfortable and quieter floor, underlayment can provide extra cushioning and sound insulation.
How do I maintain vinyl flooring with underlayment on concrete?
Vinyl flooring with underlayment on concrete is easy to maintain. It is important to sweep or vacuum regularly to remove dirt and debris. Additionally, damp mop with a vinyl-friendly cleaner when necessary.
Use furniture pads to prevent scratches on the floor. Avoid excessive moisture, and promptly clean up spills. Maintaining your vinyl flooring will keep it looking great.
Check Out More Articles Related to Flooring
- Install Plywood Underlayment for Vinyl Flooring! (D.I.Y Friendly Guide)
- Cork vs. Rubber Underlayment: Which One Should I Choose?
- Cork vs. Foam Underlayment: Which One Should I Choose?
- Do I Need Expansion Gaps for Vinyl Flooring? (Explained)
- Do You Put Vinyl Flooring Under Appliances? (Answered & Explained)